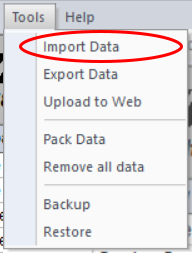
Import Data
If you have an existing spreadsheet of items in your collection, you can import those items with the IMPORT function from the main menu.
This will close the main window, and open the Import Window.
You can directly import files in the following formats:
- CSV (Comma Separated Values): This is a text file, usually with a .csv or .txt extension. It consists of a single line for each record with the field values enclosed in quotation marks and separated by commas.
- TXT (Text File): This is a text file that generally has a .txt extension. It consists of a single line for each record. Field values may or may not be enclosed in quotation marks. You can specify which character has been used to separate fields on each line.
- SDF (System Data Format): This is also a text file, usually with an .sdf extension. Every field value will be the same number of characters, with blank spaces padding out each field to make them align in clean columns on the page.
- DBF (dBase Table): This is a structured database file in xBase or dBase level 7 format, and always has a .dbf extension. dBase files from dBase DOS Version II through dBase Plus Version 12 are supported.
- DB (Paradox Table): This is a structured database file in xBase Paradox format and will have a .db extension. Caution though, many other database file formats use the .db extension including Sybase, Access, Skype and Microsoft Thumb files. These other .db formats cannot be imported with the Paradox importer.
- Excel (Microsoft Excel File): This is an Excel spreadsheet file with an .xls or .xlsx extension. Either can be imported, but saving your Excel file in the .xlsx format will result in a slightly simpler import. Workbooks with multiple tabs may be imported one tab at a time.
It is possible to import from other database or spreadsheet formats by first exporting the data from the originating program into one of the formats above. Most database and spreadsheet programs provide a way to export data into a .csv format.
The Import function will provide instructions on each step of the process.
Steps for a successful import:
- Planning: Compare your existing spreadsheet or database file to the Inventory Express Field List and Predefined Dropdown Values. Each column on the spreadsheet, or field in a database will need to be matched or "Mapped" to an Inventory Express field. The fields or columns in your database or spreadsheet are referred to as the "Source Fields." Inventory Express fields are referred to as the "Target Fields." Plan how you will map one to the other.
- To ensure all goes smoothly, write down the mapping of your columns to Inventory Express fields before doing the import. For instance if Column A on your spreadsheet contains data for where each item is stored, note: A ->Location. If your Column B is the catalog number for each item: B -> Item_No. It's also helpful to write down the data range of each tab of your spreadsheet. For instance if you have 127 items with information in columns A-F, your range is A1 - F127.
- Inventory Express will import ALL rows of your spreadsheet - including any column headings. You may wish to remove column headings prior to the import. However, when you're mapping columns to fields, The first 10 rows of data in in your spreadsheet will display to help you choose the matching field. If you leave column headings in place on your spreadsheet, each heading will display as you're mapping fields -- which can be handy. If you choose to leave column headings in place for the import, they will convert as your first "Item" - which you can then delete.
- Activate User-Defined Fields. If you have columns or fields in your spreadsheet or database that don't match any in the Inventory Express Field List, Inventory Express offers up to three User-Defined fields. These can be defined/activated through the Options Menu item.
- Clean-up Data: As the old saying goes, "Garbage in, Garbage..." The cleaner your source data, the more successful the import.
- Check your data for typos, errors, etc.
- You may wish to add columns to a spreadsheet to make the import go more smoothly. For instance if your Excel spreadsheet has a tab for each era (Prewar, Postwar, etc), but no column for Era, you might want to add an era column to each tab with "Prewar" or "Postwar" in every row to make that data import properly.
- You may wish to adjust data to match Inventory Express requirements. Three Inventory Express Fields, Category, Era and Grade will accept only specific predefined values (listed on the Inventory Express Predefined Dropdown Values PDF). For instance if the data in your Era column is "Pre" "Post," etc. instead of having each word fully spelled out, doing a universal search & replace to "fix" the data will allow it to import properly.
- Categories/Types: Inventory Express is designed so each "Type" (Boxcar, Caboose, Block Signal, etc) must be assigned to a "Category" (Accessory, Engine, Freight, etc.) If you already have a field or column containing "Type" values, you may wish to add a field/column containing "Category" values.
- Don't worry about adding options to your existing dropdown menus before you import. When you import, all of your dropdowns (except Category, Grade, Op Grade and Era) will automatically update with all of the values for those fields from your imported data.
If you do an import, and there's a problem, for instance if you had a bad field mapping, or missed importing some data, it's possible to reverse the procedure and try again by using the "Remove All Data" function.